Showing posts with label Vintage. Show all posts

Wednesday, 16 September 2020

Junk Journal Pockets & Tags Using Edith Holden Images

Nigezza Creates aka Gez, Independent Stampin' Up® Demonstrator 


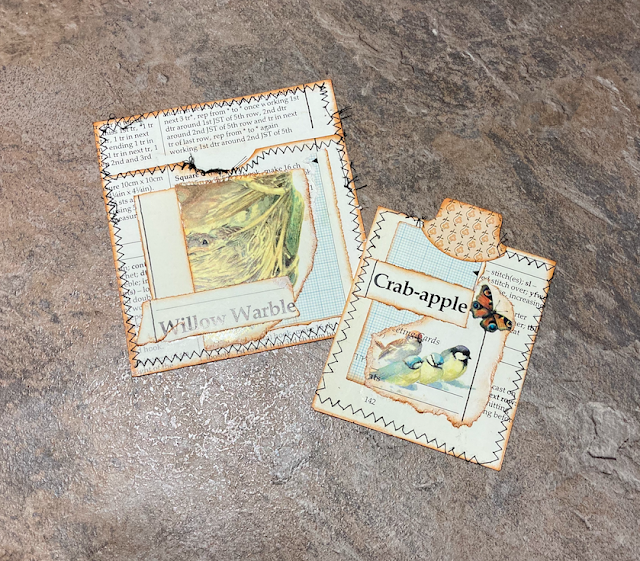
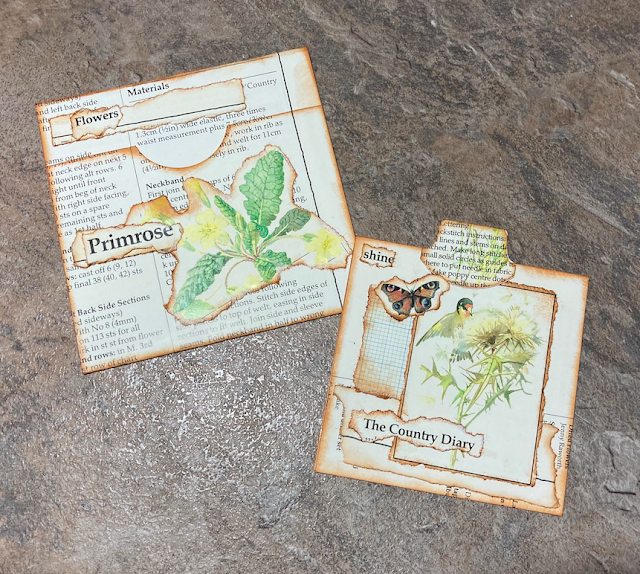
Thank you for visiting my blog, I really do appreciate it. Today as part of my Junk Journal series I am showing the pockets and tags I made using just pages from one book. It is a craft book based on the work of Edith Holden. The images are just gorgeous and many people who make junk journals use her book. I do have the book myself but as yet have not managed to cut it up! I was delighted to find this craft book i a charity shop and now that I have gutted this book I feel I may be able to cut up more books! 


Junk Journal Pockets & Tags Using Edith Holden Images


This is the book I found, in fact I found 2 of these and bought them both. There are amazing full pages of Edith Holden drawings at the start of each section. One for each month of the year. I think I might use these for a planner. 

It was my aim with this project to use this book and only this book, I wanted to help my niece see that she did not need lots of supplies to make a junk journal. 


Video Tutorial


Junk Journal Pockets & Tags Using Edith Holden Images

Junk Journal Pockets & Tags Using Edith Holden Images

Junk Journal Pockets & Tags Using Edith Holden Images

Junk Journal Pockets & Tags Using Edith Holden Images

Junk Journal Pockets & Tags Using Edith Holden Images


I hope you like this project and will check out my Junk Journal series. To make sure you don't miss any of my projects why not subscribe to my YouTube channel, follow my blog and subscribe to my newsletter? I will be back tomorrow, until then ...

Happy Crafting!

Gez xxx 

Below are the products I used, if you click on the item it will take you directly to my shop where you can purchase the items.

Product List
Paper Trimmer
[152392]
£23.00
Bone Folder
[102300]
£6.50


Don't forget to use my host code to receive a share of the Stampin' rewards as a thank you for shopping with me :-)

Host code is RA6KJZVJ


Current Offers From Me


Click here to see my offers, kits and shares :-)


My Shop 


My shop is open 24/7 Click here to shop!


Don't forget to use my host code to receive a share of the Stampin' rewards as a thank you for shopping with me :-)

Host code is RA6KJZVJ


If your order is £150 or more before P&P then do not use the host code as you qualify for host rewards on your own and can chose what you want :-)

My Team


    • If you want to start a business for £99 then this is the way to do it!
    • Choose £130 of products for £99
    • I September you also get 2 FREE stamp sets, pack of rhinestones and 16 card kits 
    • Support from me and the wider team when you join my team
    • I am also a Pootler which is Pootles team (Sam) 
    • You will also become one of these when you join with me
    • No obligation to sell, make videos, blog etc
    • You can just join up and get the 20% discount for yourself


Follow me on Social Media


Wednesday, 2 September 2020

Junk Journal: Easy Slotted Pocket Using A Stampin' Up! Punch

Nigezza Creates aka Gez, Independent Stampin' Up® Demonstrator 


Thank you for visiting my blog, I really do appreciate it. I ma here again with another junk journal project using Stampin' Up! products. after watching many tutorials I have seen a slotted pocket that was created using a die. I looked at it and thought surely I can make this. So I thought about it and came up with this quick simple solution.  


Measurements and Materials

  • Whisper White cardstock
    • This was coffee dyed
    • 3" x 4"
  • 4 slots was punched out using the Classic Label punch
  • Various journaling spots were made using 
    • Jar punch
    • Tag Topper punch
    • Postage stamp punch


Now watch the video tutorial to see how this was made :-) 

Video Tutorial


I hope you like this project and will give it a try. To make sure you don't miss any of my projects why not subscribe to my YouTube channel, follow my blog and subscribe to my newsletter? I will be back tomorrow, until then ...

Happy Crafting!

Gez xxx 

Below are the products I used, if you click on the item it will take you directly to my shop where you can purchase the items.

Product List
Jar Punch
[152703]
£17.00
Linen Thread
[104199]
£4.75


Don't forget to use my host code to receive a share of the Stampin' rewards as a thank you for shopping with me :-)

Host code is RA6KJZVJ


Current Offers From Me


Click here to see my offers, kits and shares :-)


My Shop 


My shop is open 24/7 Click here to shop!


Don't forget to use my host code to receive a share of the Stampin' rewards as a thank you for shopping with me :-)

Host code is RA6KJZVJ


If your order is £150 or more before P&P then do not use the host code as you qualify for host rewards on your own and can chose what you want :-)

My Team


    • If you want to start a business for £99 then this is the way to do it!
    • Choose £130 of products for £99
    • I September you also get 2 FREE stamp sets, pack of rhinestones and 16 card kits 
    • Support from me and the wider team when you join my team
    • I am also a Pootler which is Pootles team (Sam) 
    • You will also become one of these when you join with me
    • No obligation to sell, make videos, blog etc
    • You can just join up and get the 20% discount for yourself


Follow me on Social Media


Friday, 28 August 2020

Posted For You Vintage Card

Nigezza Creates aka Gez, Independent Stampin' Up® Demonstrator 


Thank you for visiting my blog, I really do appreciate it and hope you like the project and will take a look at the video tutorial as well.  I was playing with the lovely set Posted For You and the great rectangle postage stamp punch and came up with a lovely bright card. Then I decided to make it again but this time go all vintage. I love both versions but really love the vintage one. The bright one is coloured in using the Stampin' Blends but the vintage one is watercoloured with the ink pad and a paint brush.


Posted For You Vintage Card


Measurements and Materials

  • Card base is hick Very Vanilla card stock embossed with the Old World Paper embossing folder
  • It is a standard size card base, half a sheet of A4 scored in half
    • 5 7/8" x 4 1/8"
  • I stamped the 3 images from the tamp set in Crumb cake and used an aqua painter and some of the ink to just colour each image in
  • I then punched out each one.
  • The were popped up on dimentionals on a mat of Crumb Cake cut using the lovely Ornate Layers
  • The sentiment was stamped with Crumb Cake and cut out using the stitched rectangle
  • This was then matted onto Crumb Cake
    • 1"x3"
  • I tied a bow with linen thread to just finish it off
  • You can see in the picture below the difference between water colour and using the crumb Cake blends - I like the more subtle look of water colour for this card
  • I have also included pictures of the Shaded Spruce version  

Now watch the video tutorial to see how this was made :-) 

Video Tutorial


Time for the closeups!


Posted For You Vintage Card

Posted For You Vintage Card

Posted For You Vintage Card

Posted For You Vintage Card


I hope you like this project and will give it a try. To make sure you don't miss any of my projects why not subscribe to my YouTube channel, follow my blog and subscribe to my newsletter? I will be back tomorrow, until then ...

Happy Crafting!

Gez xxx 

Below are the products I used, if you click on the item it will take you directly to my shop where you can purchase the items.


Product List
Linen Thread
[104199]
£4.75


Don't forget to use my host code to receive a share of the Stampin' rewards as a thank you for shopping with me :-)

Host code is RA6KJZVJ


Current Offers From Me


Click here to see my offers, kits and shares :-)


My Shop 


My shop is open 24/7 Click here to shop!


Don't forget to use my host code to receive a share of the Stampin' rewards as a thank you for shopping with me :-)

Host code is RA6KJZVJ


If your order is £150 or more before P&P then do not use the host code as you qualify for host rewards on your own and can chose what you want :-)

My Team

  • Click here to join my team!
    • If you want to start a business for £99 then this is the way to do it!
    • Choose £130 of products for £99
    • Support from me and the wider team when you join my team
    • I am also a Pootler which is Pootles team (Sam) 
    • You will also become one of these when you join with me
    • No obligation to sell, make videos, blog etc
    • You can just join up and get the 20% discount for yourself


Follow me on Social Media

Sunday, 23 August 2020

3D Paper Trimmer August Blog Hop: Vacation

Nigezza Creates aka Gez, Independent Stampin' Up® Demonstrator 


Thank you for visiting my blog, I am taking part in the 3D Paper Trimmer Blog Hop today and you will have hopped her from Kathrin.  Welcome I am Gez from the UK.  The theme this month is Vacation so I have made a concertina file folder to collect all the tickets and memorabilia while on holiday ready to scrapbook when I get home.  


Measurements and Materials


The measurements for this project depend on the size of the envelopes your use. I have made 3 of these now. The original 2 were made using envelopes designed for 5"x7" cards. The folder I have made for this tutorial uses A4 envelopes cut in half so it quite a bit bigger. 

I am really pleased with the look of my up-cycled envelopes with this gorgeous vintage looking World Of Good DSP from Stampin' Up! and feel it looked a bit like a old fashioned attache case. 

  • 3 brown A4 envelopes sealed and cut in half
  • This forms 6 pockets for the file folder
  • There are two ways of gluing these together
    • Place glue the whole length of the envelope
    • OR
    • Place glue just half way down the envelope
  • For this project I put the glue just half way down each envelope but in my 2 smaller ones I have done both ways and I think I prefer this way
  • Card stock was cut the same size of the envelopes and adhered to the back and front of the stack of envelopes
  • I decided to use Whisper White and ink it up with Early Espresso ink
    • I could have used Early Espresso card stock but I did not have enough and actually I prefer the look of the inked up version as it goes well with the vintage look of the DSP
    • The DSP was also inked around the edges
  • I matted the DSP onto the Whisper White
    • This added more strength to the folder, the original ones just had DSP on them
  • The flap was made from Whisper White card stock, DSP & a layer of envelope on the inside
    • I measured the width of my envelope and cut A4 down to that size so the flap length was the size of the standard card stock width
    • Both the envelope and the DSP were also inked around the edges
    • Whisper White was again inked with Early Espresso 
    • To enable the flap to curve nicely I scored every 1/8" 
  • I used a Memories & More card for the closure
    • This was matted onto Whisper White in the same way and a piece of envelope used on the inside so it all matched
  • I used the Faux Sued Trim & the Antique Slider to fasten the folder
    • Ribbon was stuck between the layers of card and Memories and More 
    • Enough ribbon was cut to go all the way round the folder with extra to allow for expansion and to tie 
    • The slider was placed near the Memories and More card and when tying the ribbon it was looped through the slider for extra security  
 

Video Tutorial


If you pop back on Wednesday I will have the video tutorial for you as part of my Junk Journal series :-)

Time for the closeups!


I hope you like this project and will give it a try. To make sure you don't miss any of my projects why not subscribe to my YouTube channel, follow my blog and subscribe to my newsletter? I will be back tomorrow, until then ... please click the next button below to continue on the hop, next up is Elisabeth :-) 

Happy Crafting!

Gez xxx 


Below are the products I used, if you click on the item it will take you directly to my shop where you can purchase the items.


Product List 

Don't forget to use my host code to receive a share of the Stampin' rewards as a thank you for shopping with me :-)

Host code is RA6KJZVJ


Current Offers From Me


Click here to see my offers, kits and shares :-)


My Shop 


My shop is open 24/7 Click here to shop!


Don't forget to use my host code to receive a share of the Stampin' rewards as a thank you for shopping with me :-)

Host code is RA6KJZVJ


If your order is £150 or more before P&P then do not use the host code as you qualify for host rewards on your own and can chose what you want :-)

My Team

  • Click here to join my team!
    • If you want to start a business for £99 then this is the way to do it!
    • Choose £130 of products for £99
    • Support from me and the wider team when you join my team
    • I am also a Pootler which is Pootles team (Sam) 
    • You will also become one of these when you join with me
    • No obligation to sell, make videos, blog etc
    • You can just join up and get the 20% discount for yourself

Follow me on Social Media