
Nigezza Creates aka Gez, Independent Stampin' Up® Demonstrator
Thank you for visiting my blog, I really do appreciate. I am so excited to be sharing with you the third episode of my first Junk Journal. If you missed episode 1 you can view it here :-) episode 2 is here :-)
So this is a series that takes you through the process from start to finish ...not that it is finished yet of course! It is a work in progress and I hope you will join me. I have made mistakes and I have learned from them and I have enjoyed every minute.
This episode shows you how I sewed the signatures to the cover of the journal.

Measurements and Materials
I normally give you the measurements of my projects, but for this project this will not always be possible as it is often not precise as it involves ripping paper!
The signatures in this Junk Journal are me using A4 sheets folded in half to make an A5 sized journal.
I have used ordinary copier paper, music printed paper, graph paper, pattered paper, old maps, book pages, doilies and envelopes that I dyed with coffee, tea and avocado.
I have used Stampin' Up! inks and stamps and lots of long neglected stash that have been hoarded over the decades!
Template for the holes for the signature placement
- I cut a piece of copier paper the same size of the spine
- Folded it in half both ways to find the centre
- Folded the long sides to the centre point to form the 3 long lines where the signatures would be sewn
- Folded the 2 short edges to the centre point, then folded the outer edges to the fold just made
- this gave me the 2 outer points where the signatures would be attached

- The stitch I used to sew
- Go in the middle hole from the centre of the signature leaving enough thread to over hang the bottom of the page
- Come back in the bottom hole from back of book to middle
- The go back through the centre hole again keeping hold of the end of the tread to keep it all tight
- The come back in the top hole from back of signature to the centre
- Pull both ends of thread to make sure all tight
- Push the needle under the thread that runs from the bottom hole to the centre hole
- Now knot the 2 ends of the tread making sure everything is tight
- Double or triple knot to make sure it is secure
- Trim ends as desired
Now watch the #3 video tutorial in this Junk Journal series :-)
I have taken some screen shots from the video to hopefully help you see what I was doing.


Video's & Channels I have watched
I have watched soooo many youtube videos about Junk Journalling but these are the ones I keep going back to. They have really inspired me to finally get started.
Carol Tinson Crafty Emporium Designs
If you can recommend any other channels I would be very happy to take a look :-)
If you can recommend any other channels I would be very happy to take a look :-)
I hope you like this series and are inspired to give it a try yourself. To make sure you don't miss any of my projects why not subscribe to my YouTube channel, follow my blog and subscribe to my newsletter? I will be back tomorrow, until then ...
Happy Crafting!
Gez xxx
Below are the products I used, if you click on the item it will take you directly to my shop where you can purchase the items.
Product List
If your order is £150 or more before P&P then do not use the host code as you qualify for host rewards on your own and can chose what you want :-)

Happy Crafting!
Gez xxx
Below are the products I used, if you click on the item it will take you directly to my shop where you can purchase the items.
Product List


")


Current Offers From Me

Parisian Beauty On Line Class


My Shop
My shop is open 24/7 Click here to shop!
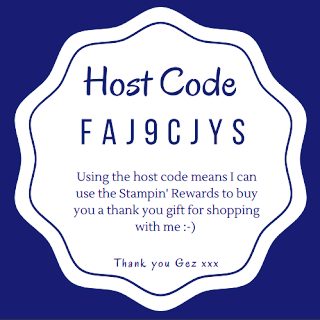
Don't forget to use my host code to receive a share of the Stampin' rewards as a thank you for shopping with me :-)

Don't forget to use my host code to receive a share of the Stampin' rewards as a thank you for shopping with me :-)
Host code is FAJ9CJYS
If your order is £150 or more before P&P then do not use the host code as you qualify for host rewards on your own and can chose what you want :-)
My Team

- If you want to start a business for £99 then this is the way to do it!
- Choose £130 of products for £99
- Plus during Sale-A-Bration you get an extra stamp set, a mini cutter & a sample pack of DSP
- You also receive a business pack to get you started
- 2 months FREE online shop
- Support from me and the wider team when you join my team
- I am also a Pootler which is Pootles team (Sam)
- You will also become one of these when you join with me
- No obligation to sell, make videos, blog etc
- You can just join up and get the 20% discount for yourself
No comments:
Post a Comment